How to Configure Suspicious Objects on EdgeOne – Nozomi Guardians
- 27 Mar 2023
- 3 Minutes to read
- Print
How to Configure Suspicious Objects on EdgeOne – Nozomi Guardians
- Updated on 27 Mar 2023
- 3 Minutes to read
- Print
Article summary
Did you find this summary helpful?
Thank you for your feedback!
Summary
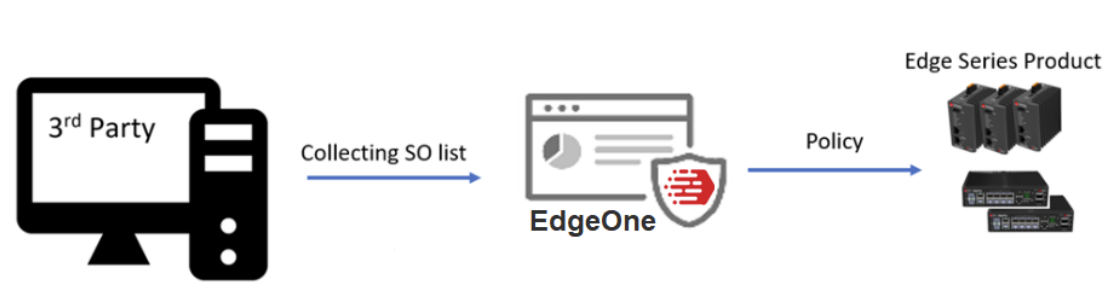
EdgeOne provides Suspicious Object (SO) policy integrated with third-party products. With the feature, users can pull suspicious objects to the Edge devices from the EdgeOne global Suspicious Object Pool to configure approved options. Then, users can insert rules or wait until these rules are reviewed and confirmed.
Applicable Version
All versions of EdgeOne
Details
1. Configuring EdgeOne
Creating API Keys
- Access the EdgeOne.
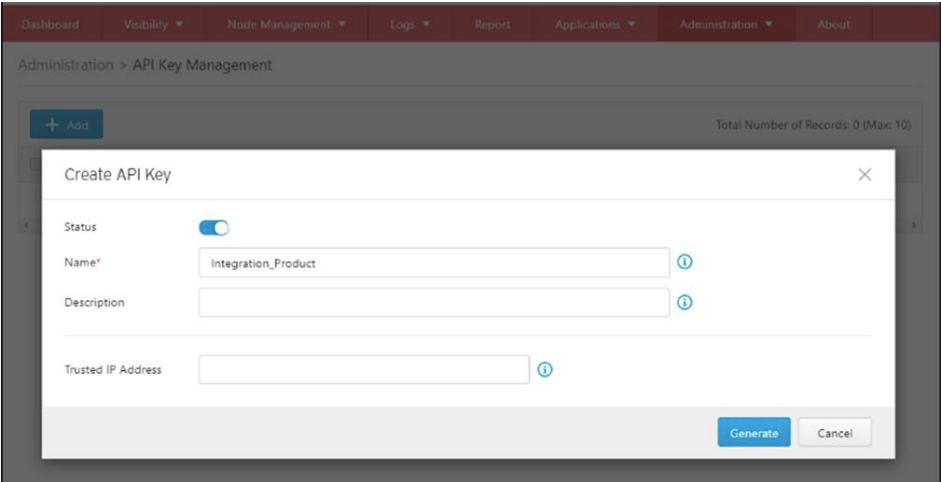
- Go to [Administration] > [API Key Management].
- Click the [Add] button to create a new API key
a. Input the name of the API client.
b. Provide a description of the API client if necessary.
c. The [Add] of the API key will be created. If it is configured, the system will reject API requests from clients’ IP addresses that do not match the given trusted IP address.
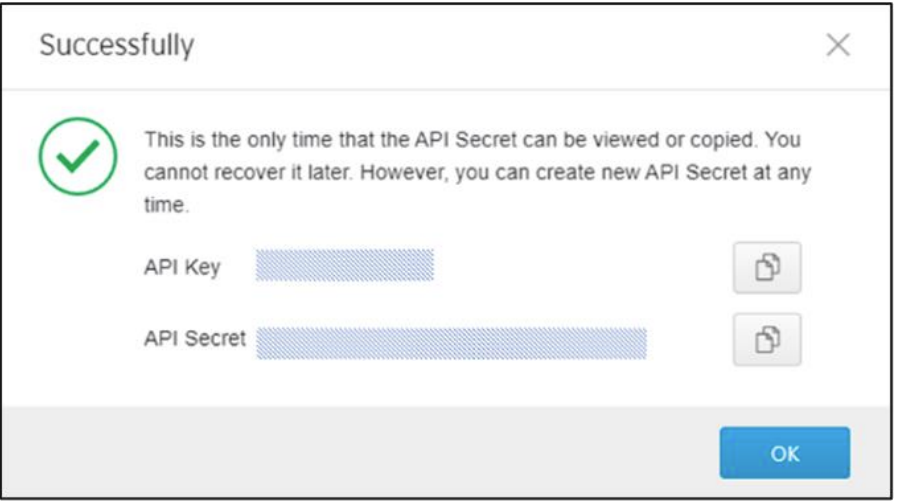
- A new API key and API secret will be generated and displayed on the screen. Click the copy buttons to copy the API key and API secret, and paste them onto the API client.
Starting from v1.3, a set of RESTful APIs is available for external systems to block the Node or Link type of suspicious objects (SO) on the Edge devices. The products and services supporting the SO integration are listed below:
- Trend Micro Deep Discovery Inspector v5.8
- Nozomi Guardian 21.20
To configure settings of the third-party product, please refer to the section below , Integrating the Third-Party Products.
2. Configuring Suspicious Object Pool
Suspicious Objects (SO) are suspicious IP addresses (Nodes) or network connections (Links) to be monitored/blocked on the Edge series devices. They are imported to EdgeOne from the external SO sources, such as third-party products, via the Suspicious Object API keys.
The Suspicious Object Pool allows administrators to review the imported suspicious objects and to configure how the system imports objects or ages them out of the pool.
Reviewing Imported Suspicious Objects
- Access the EdgeOne.
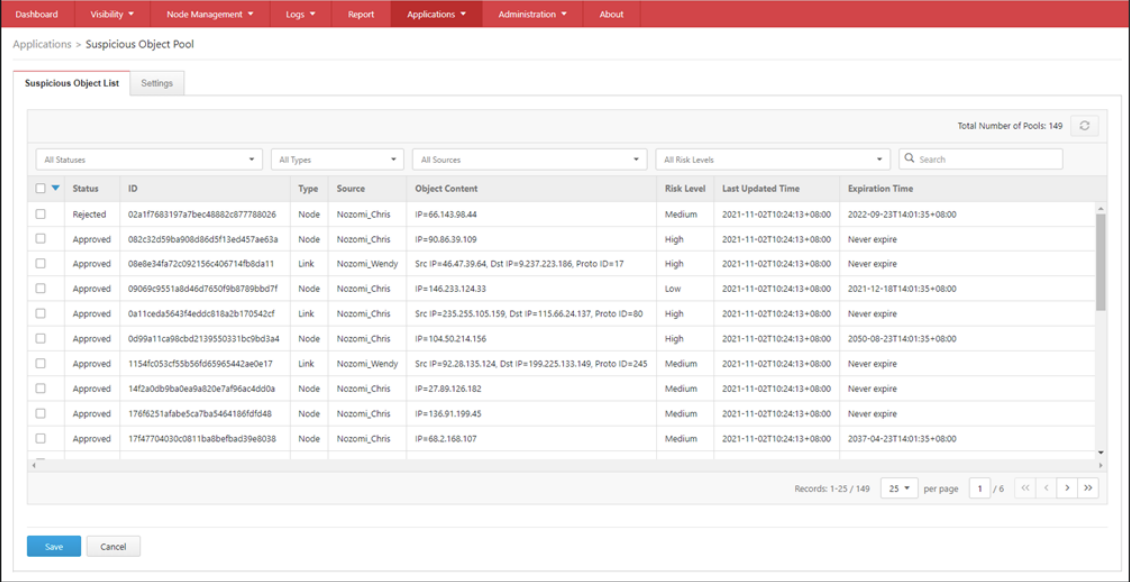
- Go to [Application] > [Suspicious Object Pool].
- Click the [Suspicious Object List] tab.
- Click the checkboxes to select/deselect suspicious objects and choose a desired action,
- “Approve”, “Reject” or “Delete”, for the selected objects.
- Click the [Save] button to save the settings.
3. Configuring Suspicious Objects
The Suspicious Object screen allows you to define the filter rules to pull suspicious objects from the global Suspicious Object Pool into a device group.
- Enabling Suspicious Object Feature
- Access the EdgeOne.
- Go to [Visibility] > [Asset View].
- Click the device group you want to manage.
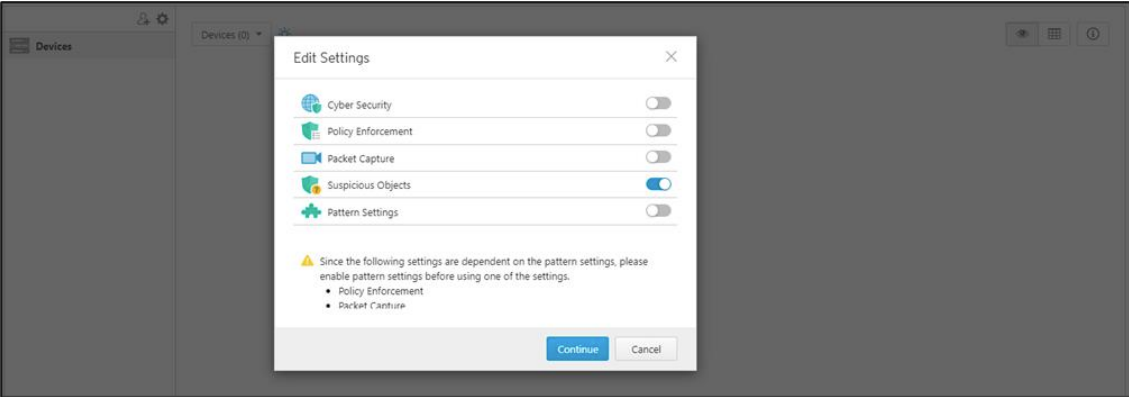
- Click the [Edit Settings] button and an [Edit Settings] pop-up window will appear.
- Ensure that [Suspicious Object] is enabled, and then click the Continue button.
- Click the [Save] button to save the settings.
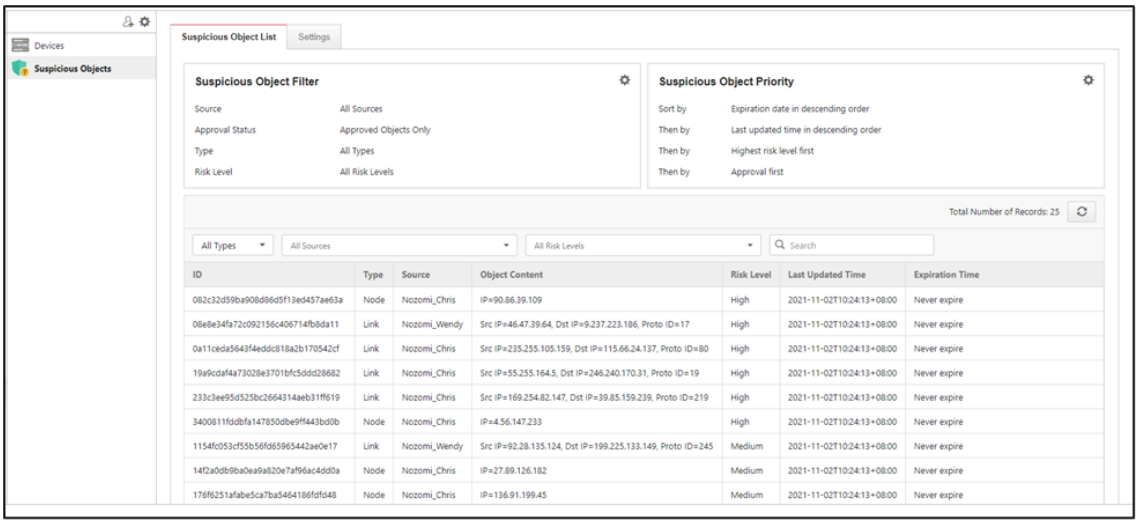
- Viewing the Suspicious Objects of Device Group
The system will pull the suspicious objects from the global Suspicious Object Pool to this device group according to the given filter and display them in the table below the configuration panes. EdgeOne will synchronize the suspicious object list to all devices in the group automatically.
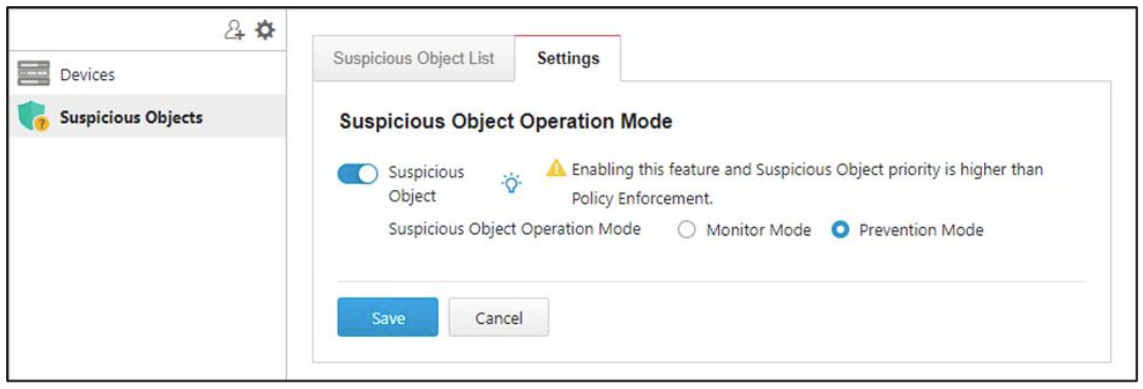
- Enabling Suspicious Object Operation Mode of Device Group
- Access the EdgeOne.
- Go to [Visibility] > [Asset View].
- Click the device group you want to manage.
- Click [Suspicious Objects] > [Settings].
- Ensure that [Suspicious Object] is enabled, and click the [Save] button to save the settings.
4. Integrating the Third-Party Products
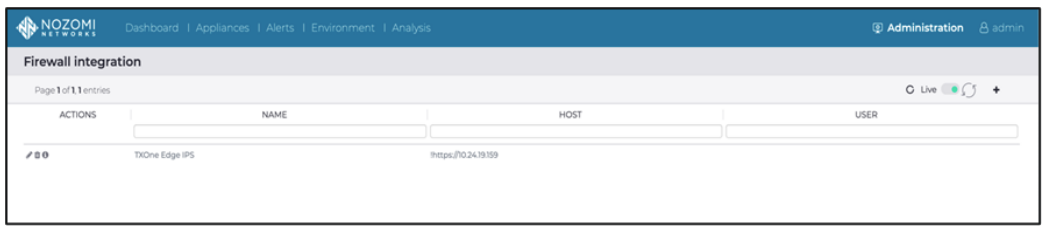
- Access the Nozomi Guardian console.
- Go to [Administration] > [Firewall integration].
- Click the “+” add button to create a new firewall.
- Choose the firewall “TXOne Edge IPS”.
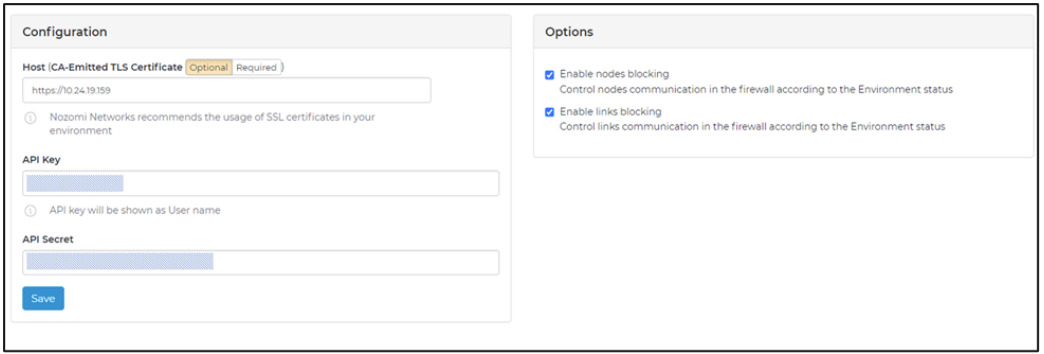
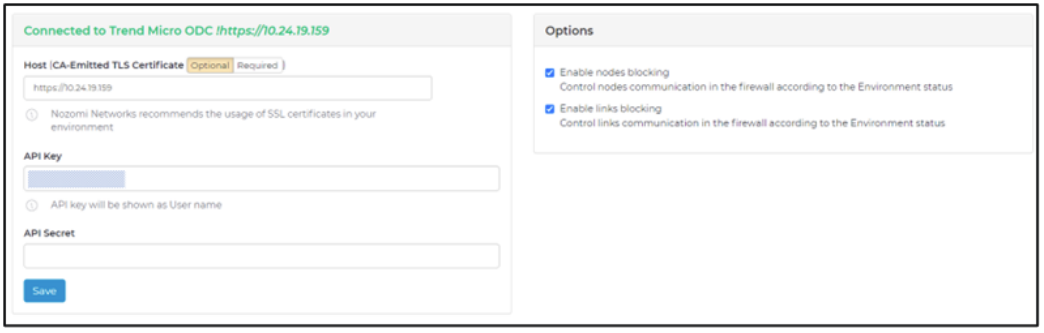
- Configure the settings below.
a. Complete the fields [Host] (input TXOne EdgeOne IP address), [API Key] and [API Secret].
b. Enable nodes and links blocking.
c. Click the [Save] button.
- The message "Connected to TXOne EdgeOne !https://< IP >" will be shown on the top of the screen.
- Go back to [Firewall integration] page and the linkage profile will be ready.


For support assistance, please Contact Us at support@txone.com or your Support Provider.
Was this article helpful?