Summary
This document contains the steps for the collection of StellarOne debug logs.
Details
When troubleshooting StellarOne issues, collecting debug logs is crucial for identifying the root cause. Follow these steps:
Step 1: Access the RDQA Page
- Open your web browser and navigate to https://<StellarOne_Server>/rdqa.
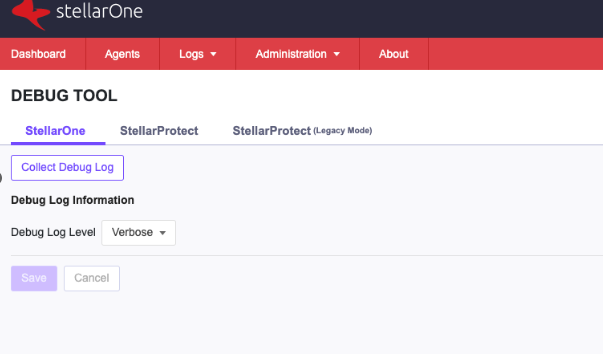
Step 2: Set Debug Log Level to Verbose
- Select the Verbose option from the Debug Log Level dropdown menu.
- Click the Save button.
Set the Debug Log Level to Verbose before reproducing the issue. If the level is too low, you may need to repeat the process and capture the logs again with a higher level for more detailed information.
Step 3: Reproduce the Issue
- Perform the steps that originally led to the issue so that the debug logs can capture all necessary details.
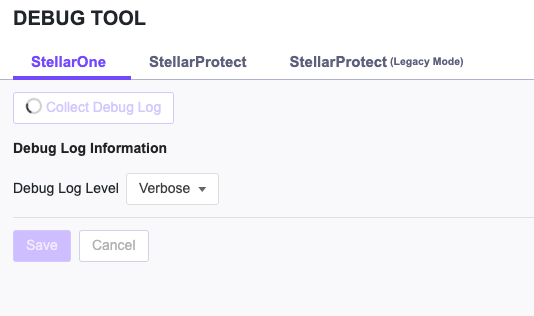
Step 4: Collect Debug Logs
- Click the Collect Debug Log button.
Step 5: Reset Debug Log Level
- Switch the Debug Log Level back to Warn (the default setting).
- Click Save to finalize the change.
This method serves as a backup option for retrieving the server debug log in situations where the customer is unable to access the StellarOne console.

SCP
Similar to scp tool, it use ssh protocol to sent file. Since this is for debug log transfer, no source argument required
scp dlog <USER_NAME> <IP> <DIRECTORY>
For Windows 10 and above, follow below step to install Openssh:
- Go to Windows Setting > System > Manage optional features > Add a feature
- Select OpenSSH Server and click Install
- If you cannot install OpenSSH Server using this way, try download and manually install PowerShell
- For more installation methods, please check windows document.
- Enable port 22 for OpenSSH Server (income) or disable Firewall
- Go to Windows Service and make sure OpenSSH service are running

On StellarOne, use "/" to replace "" for Windows file path , as shown in the example below
scp dlog zen 192.168.15.133 C:/Users/zen/Desktop
Input windows user password. If success you will see below message
SFTP
This command supports the SFTP protocol, which operates under an SSH server. It is different from FTP, and we do not support the FTP protocol
sftp dlog <USER_NAME> <IP> <DIRECTORY>
For Windows 10 and above, follow below step to setup SFTP:
- Go to Windows Setting > System > Manage optional features > Add a feature
- Select OpenSSH Server and click Install
- Enable port 22 for OpenSSH Server (income) or disable Firewall
- Go to C:\ProgramData\ssh
- Find below block inside file sshd_config
# Example of overriding settings on a per-user basis
#Match User anoncvs
#   AllowTcpForwarding no
#   PermitTTY no
#   ForceCommand cvs server

Match Group administrators
       AuthorizedKeysFile __PROGRAMDATA__/ssh/administrators_authorized_keys
- Modify block content as below
# Example of overriding settings on a per-user basis
#Match User anoncvs
#   AllowTcpForwarding no
#   PermitTTY no
#   ForceCommand cvs server

Match Group administrators
       AuthorizedKeysFile __PROGRAMDATA__/ssh/administrators_authorized_keys
       ForceCommand internal-sftp
       Match User <Windows username allow to use this service>
       ChrootDirectory <root location of sftp server>
For example
# Example of overriding settings on a per-user basis
#Match User anoncvs
#   AllowTcpForwarding no
#   PermitTTY no
#   ForceCommand cvs server

Match Group administrators
       AuthorizedKeysFile __PROGRAMDATA__/ssh/administrators_authorized_keys
       ForceCommand internal-sftp
       Match User zen
       ChrootDirectory C:\Users\zen\Desktop\
- Restart or Start OpenSSH service
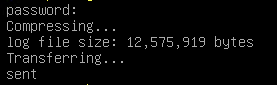
On StellarOne, the command below will send log.tar.gz to C:\Users\zen\Desktop\ as configured above
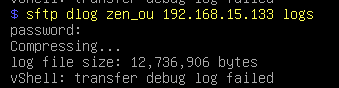
sftp dlog zen 192.168.15.133 /
Troubleshooting
Q: Failed without Compressing
A: Authenticate failed. Please check network, Openssh server and username/password

Q: Failed with Compressing
A: Path issue. Please make sure the folder is exists on server and user have permission to write on that folder.